

The evolution of a recipe
The classic date pinwheel cookies, revisited

You know how sometimes you don’t remember the first time you tried something? As far as you’re aware, that thing always existed. There wasn’t a before, there wasn’t an after.
That’s these date pinwheel cookies.
The recipe is from my dad’s mom. I asked her for the recipe in December 2020, a fitting time to be craving sweet nostalgia. She texted a picture of the recipe card, delightfully vague in its instructions.
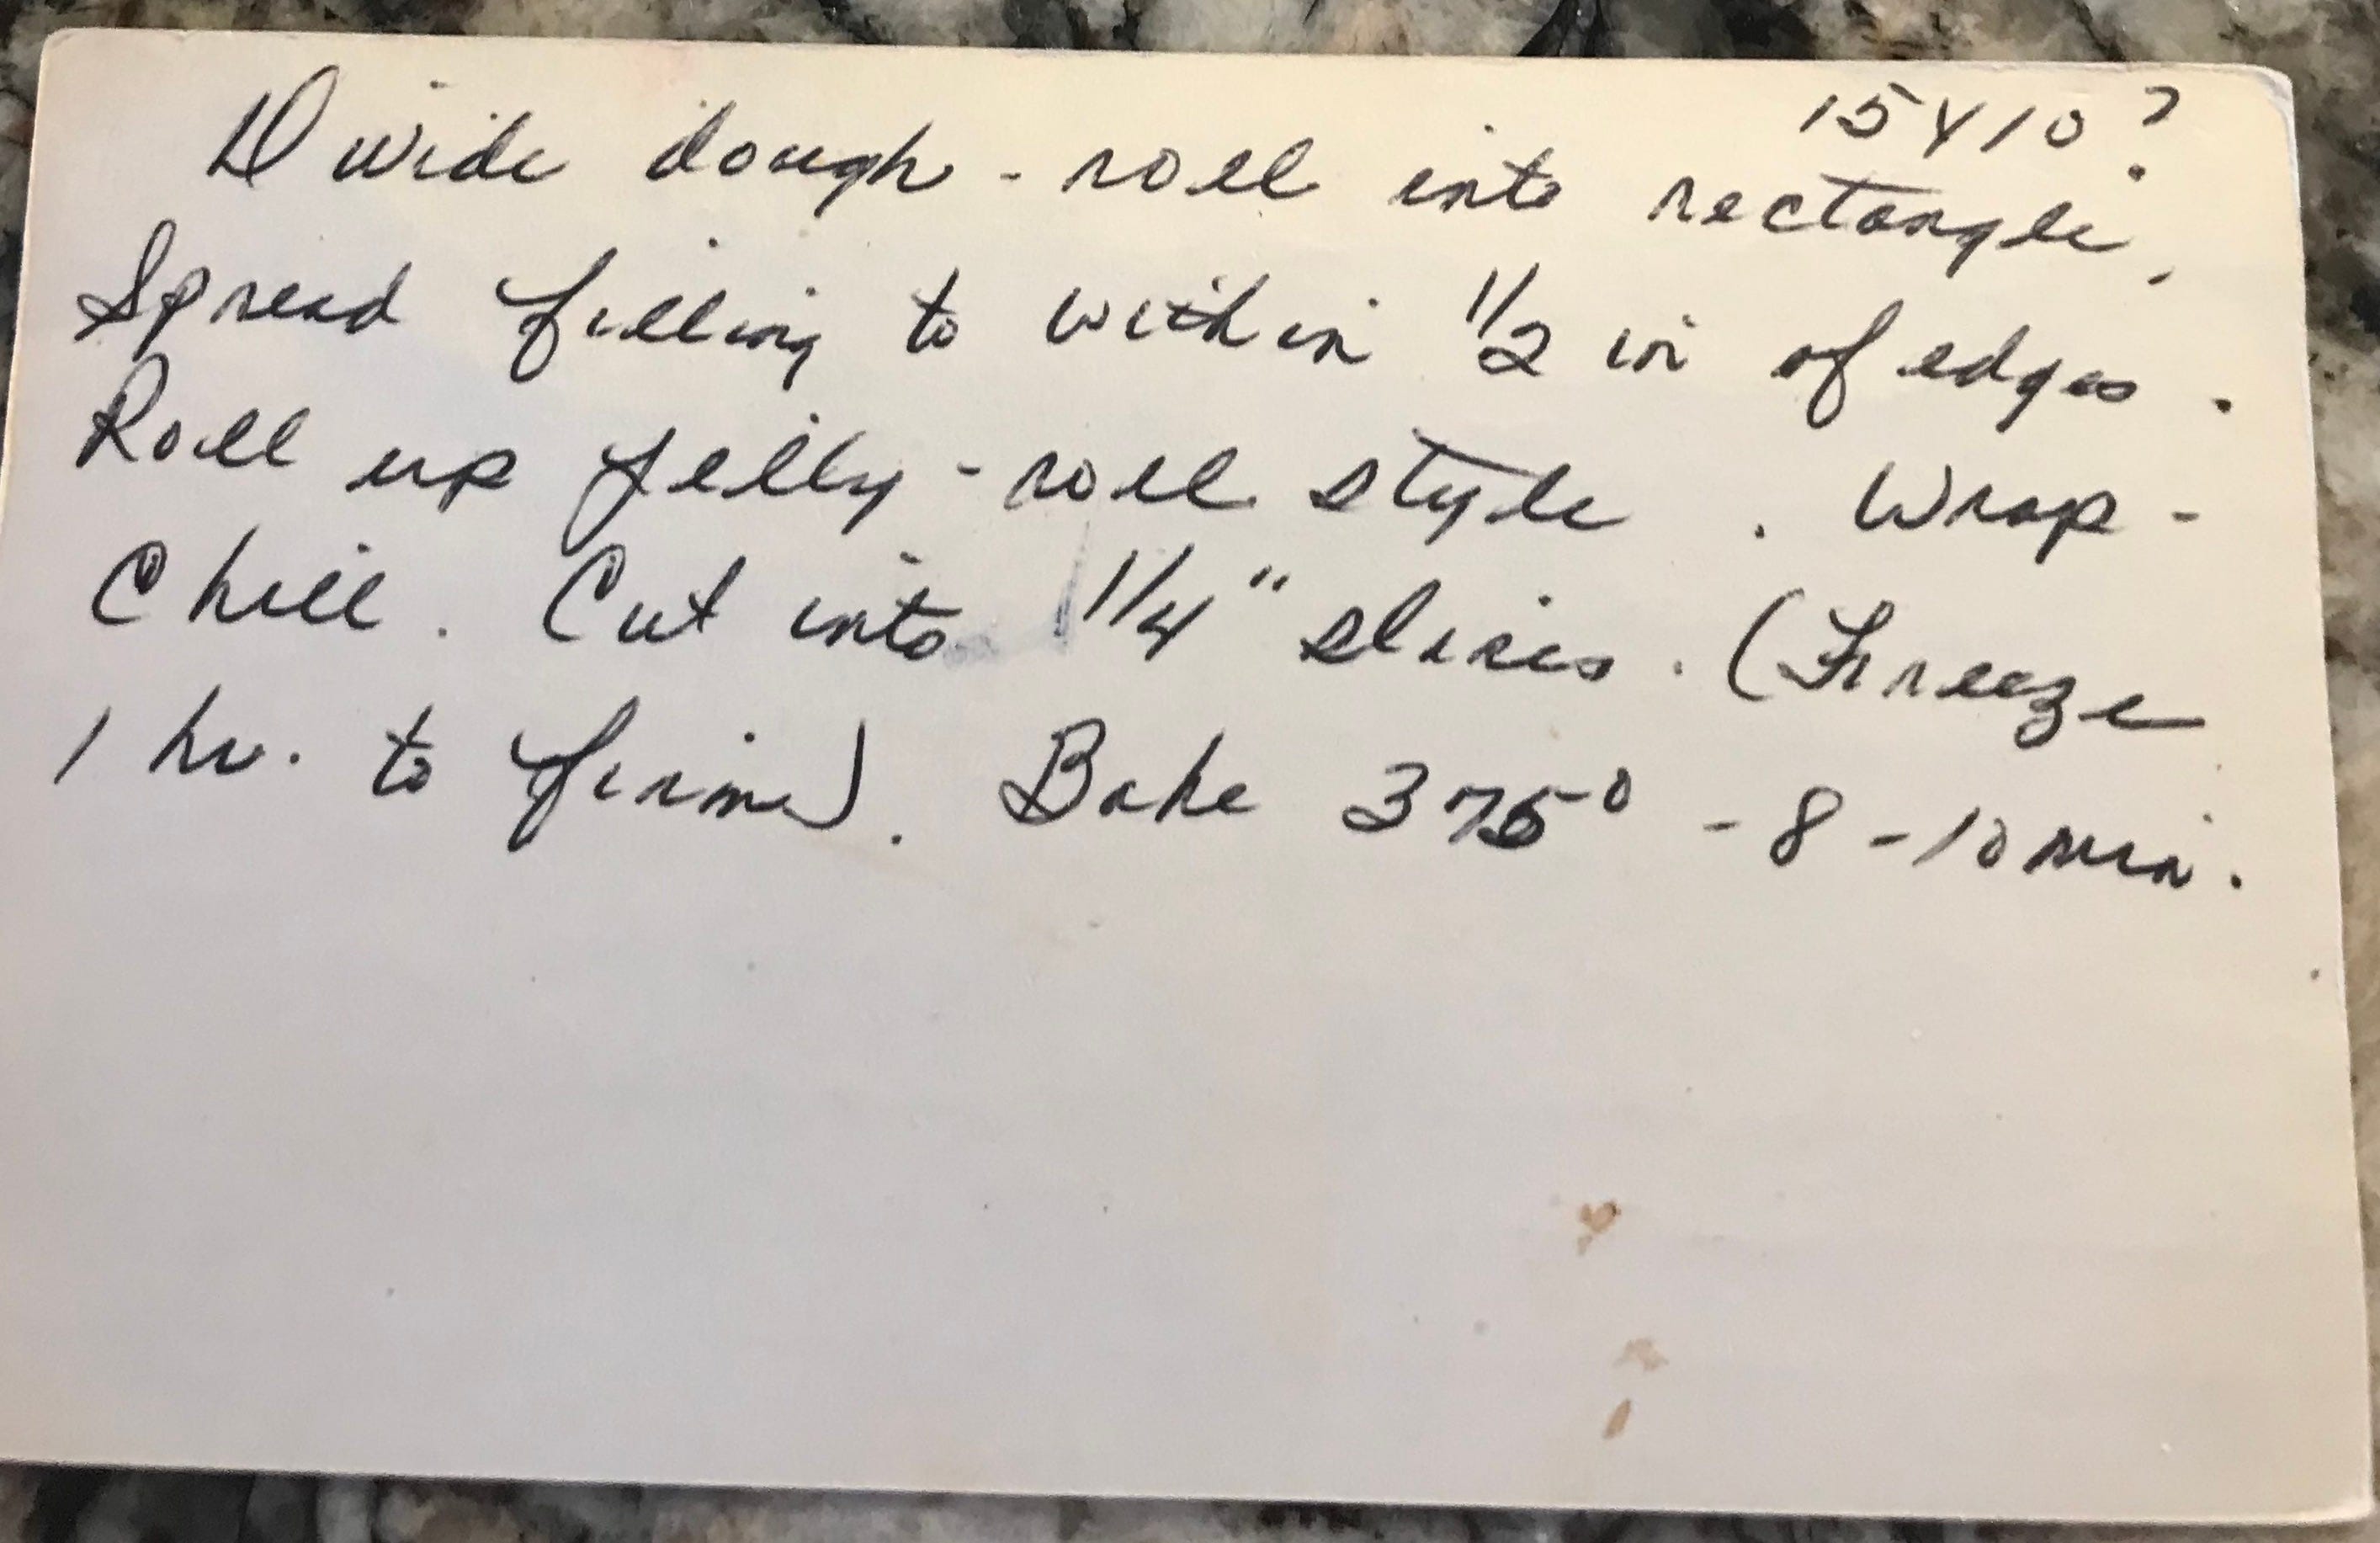
Based on my grandma’s age and the recipe’s origin (from a neighbor when she was a teenager), I’m guessing this specific recipe is from the late 1940s or ‘50s, though pinwheel cookies as a genre became quite popular in the ‘30s when everyone had their ice box for chilling and no-waste recipes (such as a slice and bake cookie instead of a cookie resulting in scraps) were practical during Depression years.
The date pinwheel though? Dates would’ve been relatively new to the US, having arrived in southern California in the early 1900s from Algeria (and soon after from Morocco and beyond). This recipe also came from someone living in fairly rural eastern Washington, which makes the dates a little surprising to me — like they’d still be considered rare and exotic? — but that’s the power of American marketing for you, I suppose.
Though the original recipe makes excellent cookies — tastes just like grandma’s! — I’ve made a few adjustments to make them even better.
First, I replaced some of the all-purpose flour with a little rye, which adds an almost spicy note. If you don’t have or like rye flour, you can stick with all-purpose, or try another whole-grain flour that you do like. (It’s only 100 grams and this dough is forgiving.) I also reduced the sugar in the dough. The addition of lemon zest — a little or a lot, up to you — really makes the whole cookie pop.
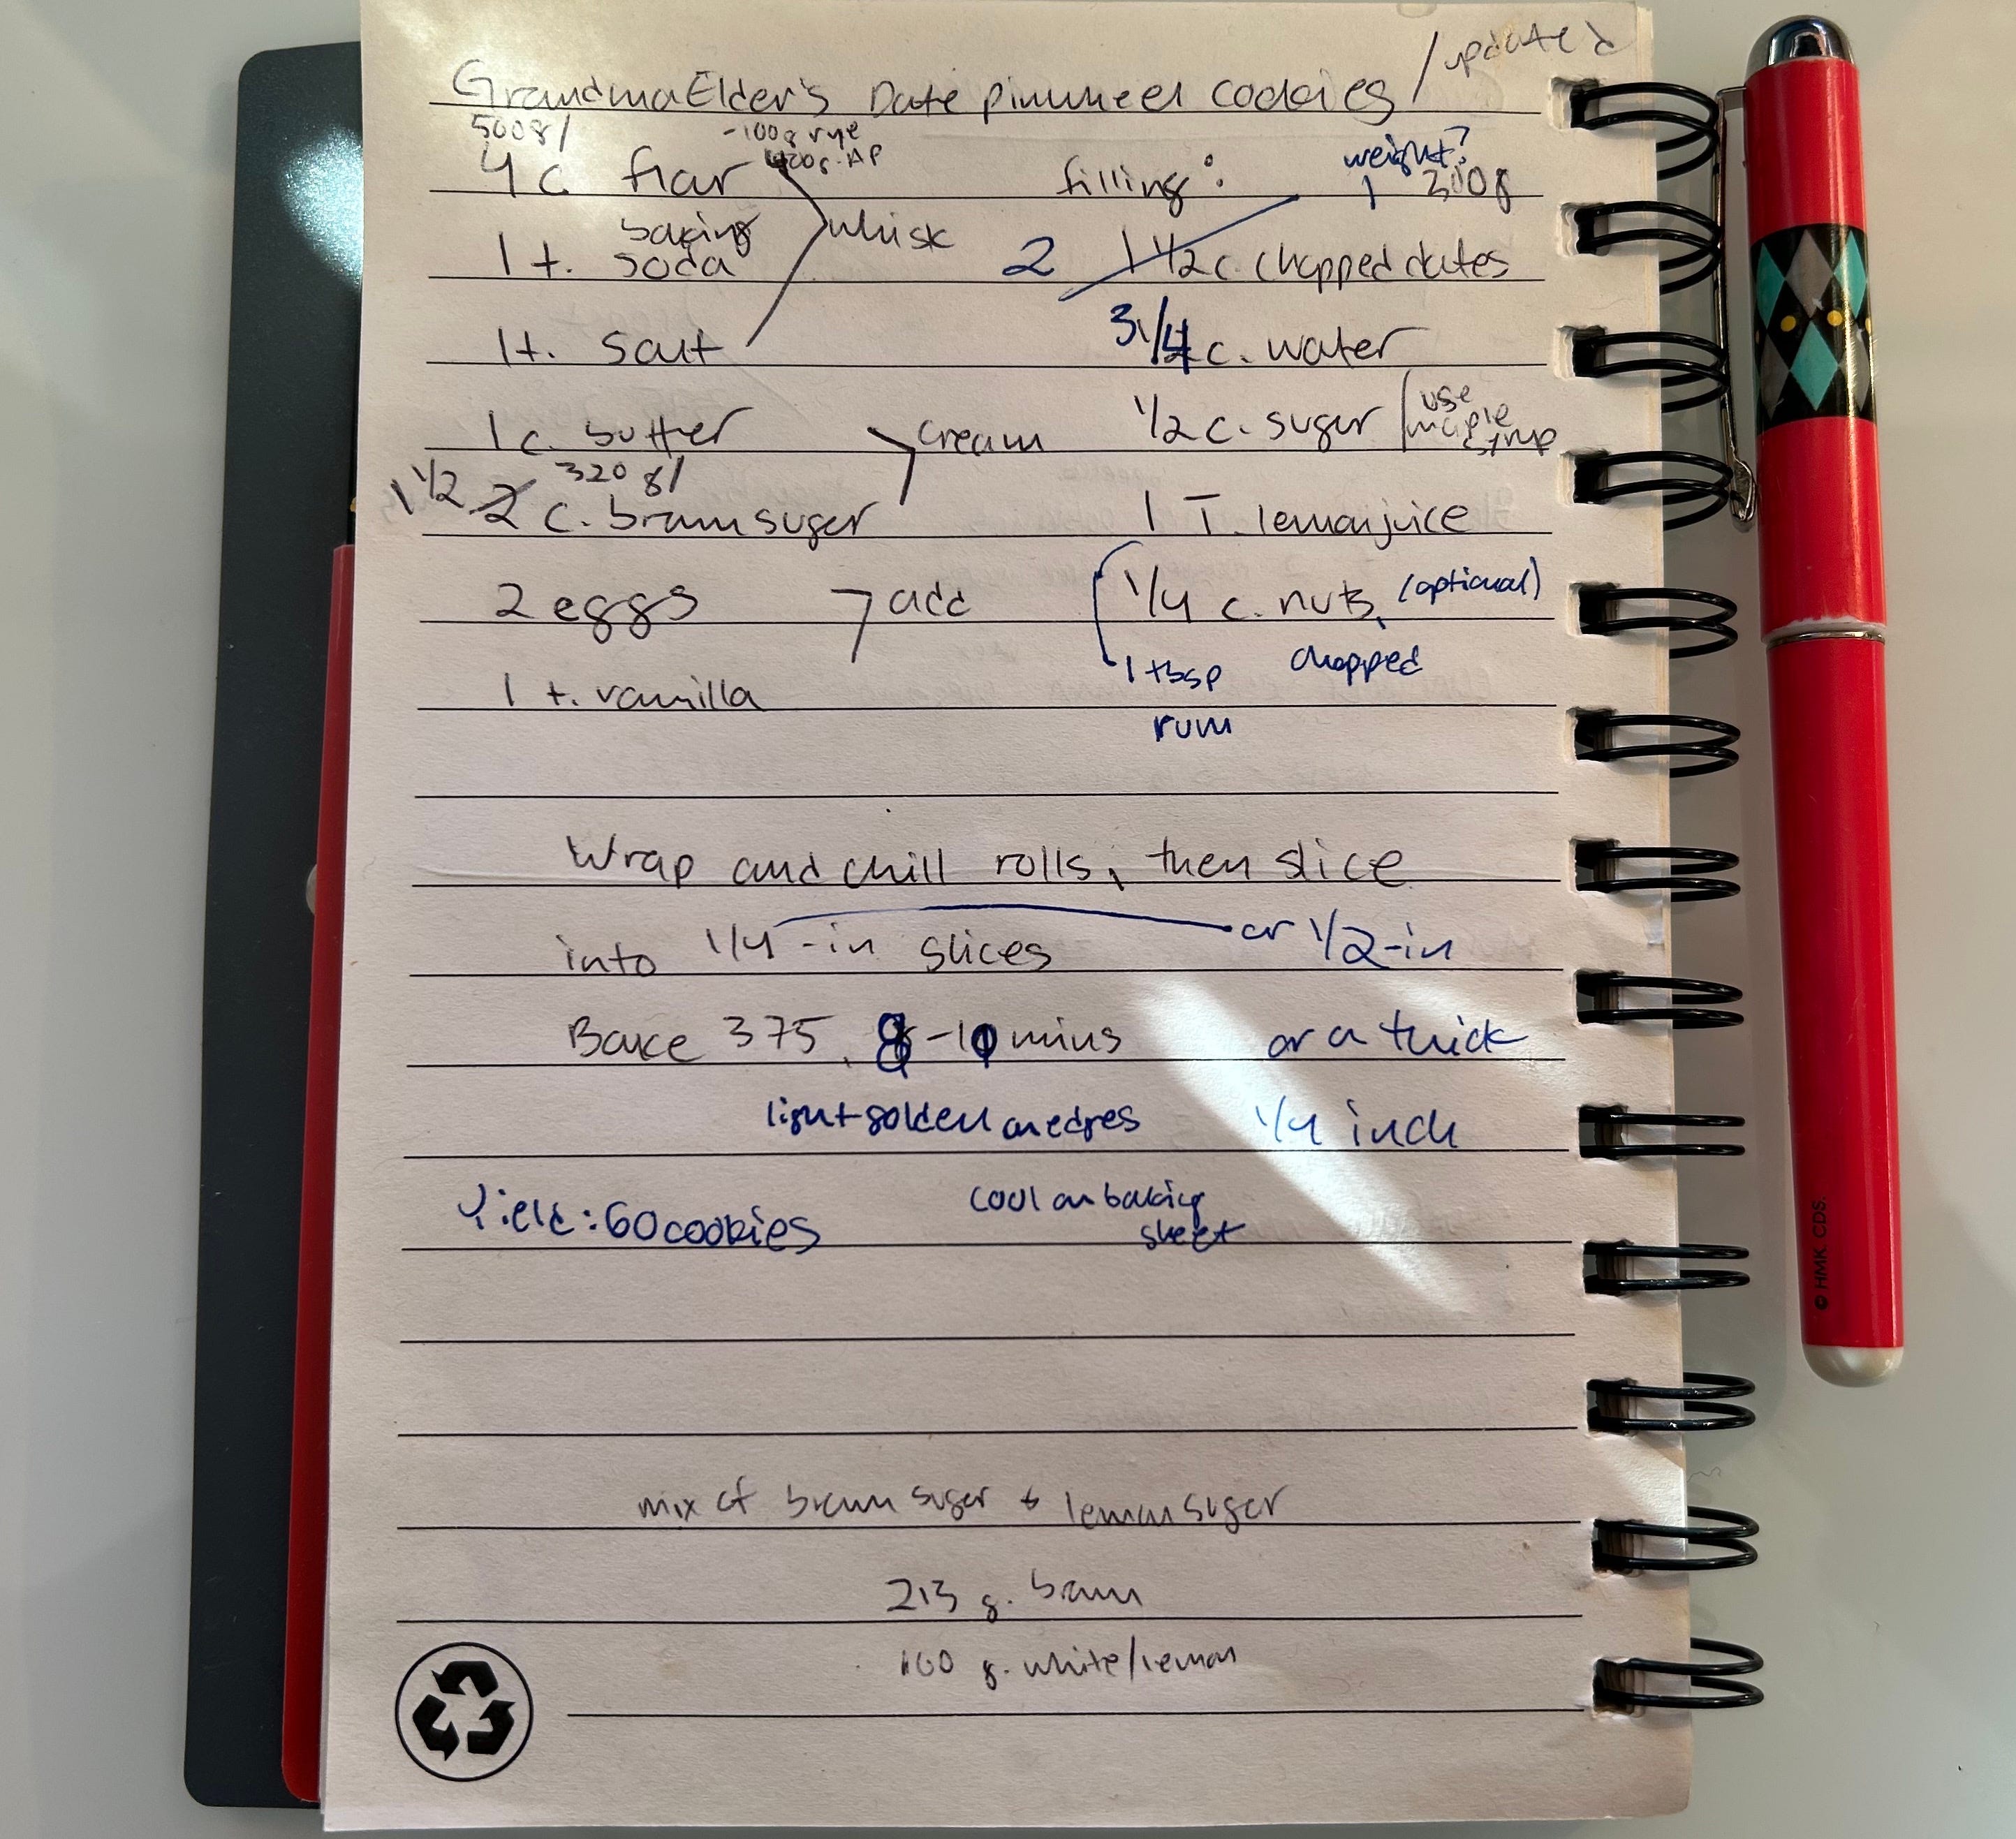
As you can see in the original and my updated version, Grams and I agree that 1 1/4 cups of chopped dates isn’t enough. I increased mine to 2 cups and used maple syrup instead of sugar, then pureed the cooked, softened dates with an immersion blender to make spreading the filling super easy. You can add chopped nuts if you want; I opted not to this time. A little rum is nice in the filling too, but that’s honestly just so you can say you’ve added rum. It’s not really necessary.
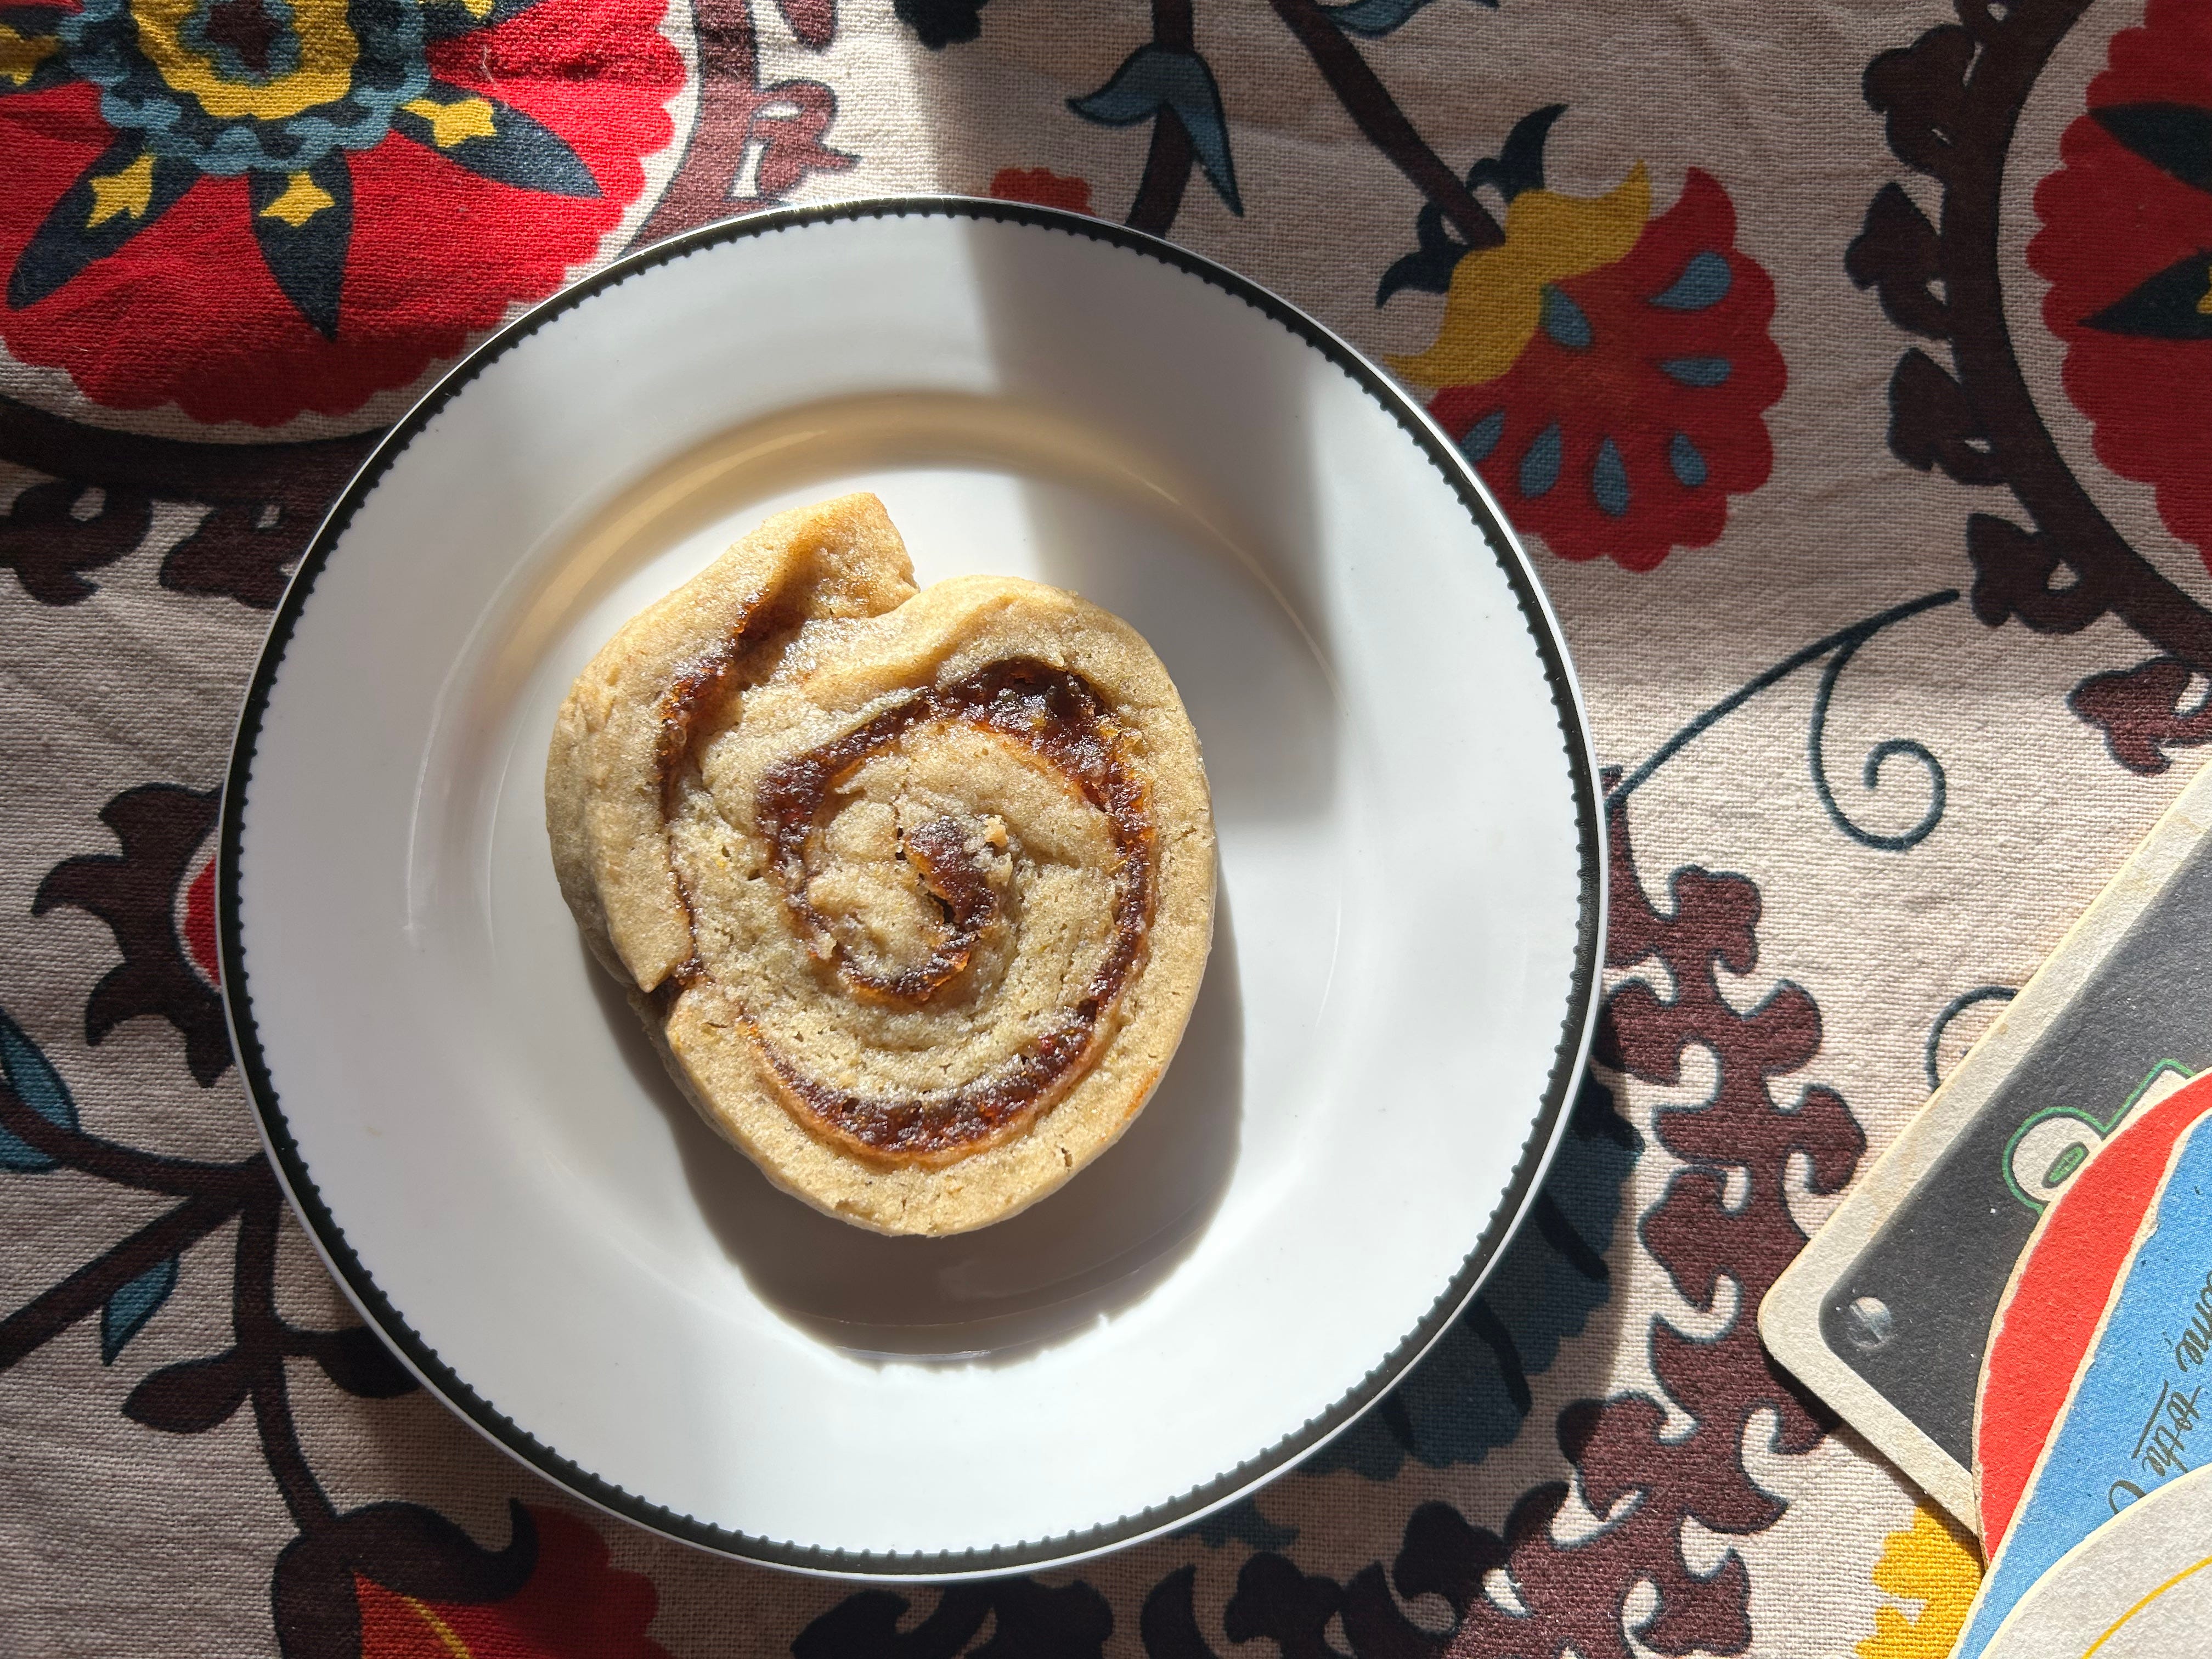
The result: soft cookies with a gooey, butterscotch-like filling swirled throughout. (God, I sound like I’m writing for SEO.) I exclusively make these during the holidays, but you don’t have to abide by such restrictions. If you do happen to make them this week, here’s a lil’ holiday soundtrack to pair it with.
Date pinwheel cookies
I’m giving the measurements in grams. If you don’t have a scale, for the dough you want 4 cups total flour (make about 3/4 cup of that rye flour if you’re using it), 1 cup brown sugar, and 1/2 cup white sugar. For the filling, you’ll need 2 cups chopped dates.
I made these in Denver, i.e. at high altitude, but made no adjustments. They’ll work for you sea level folks, too.
Baking times depend on how you cookie. I like them when they seem like they’re underbaked but then they end up perfectly soft because they cool on the baking sheets (9 minutes). If you’re a crispy cookie person (weird, but ok), bake them a bit more.
This makes about 60 cookies but halves easily. Alternatively, you can bake one roll’s worth and stash the other in the freezer for up to 3 months.
For the filling:
300 grams pitted dates, chopped
3/4 cup water
1/2 cup maple syrup
1 tablespoon lemon juice
For the dough:
400 grams all-purpose flour
100 grams rye flour
1 teaspoon baking soda
1 teaspoon sea salt
100 grams granulated sugar
1 tablespoon lemon zest (less is fine)
213 grams light or dark brown sugar
226 grams (2 sticks) unsalted room temp butter
2 large eggs
1 teaspoon vanilla extract
Make the filling first: put the dates, water, and maple syrup in a small saucepan set over medium-high heat. Bring to a boil, then reduce the heat to maintain a strong simmer. Cook for about 5 to 10 minutes, stirring often, until the dates soften and the liquid thickens. Remove from heat and puree with an immersion blender (or mash really well with a fork). Stir in the lemon juice.
The finished filling should be thick but spreadable; if it’s too thin, cook it longer. If it’s too thick to spread easily, stir in a tiny bit more water. Let the filling cool while you make the dough.
For the dough: whisk together the flours, baking soda, and salt in a medium mixing bowl. Put the granulated sugar in a small bowl and use your fingers to massage the lemon zest into the sugar (which releases the zest’s oils and brings out more lemon flavor).
Cream the lemon sugar, brown sugar, and butter: use a stand mixer with a paddle attachment, or do this by hand with a sturdy whisk and large bowl. Mix in the eggs, then stir in the vanilla.
Add the dry ingredients about a cup at a time, stirring on low if using a stand mixer, and mixing just until no dry streaks remain. Plop the dough onto a baking sheet-sized piece of parchment paper. If the dough seems dry, sprinkle on a little water and knead it gently together with your hands. Divide the dough in half, putting one half on another piece of parchment paper.
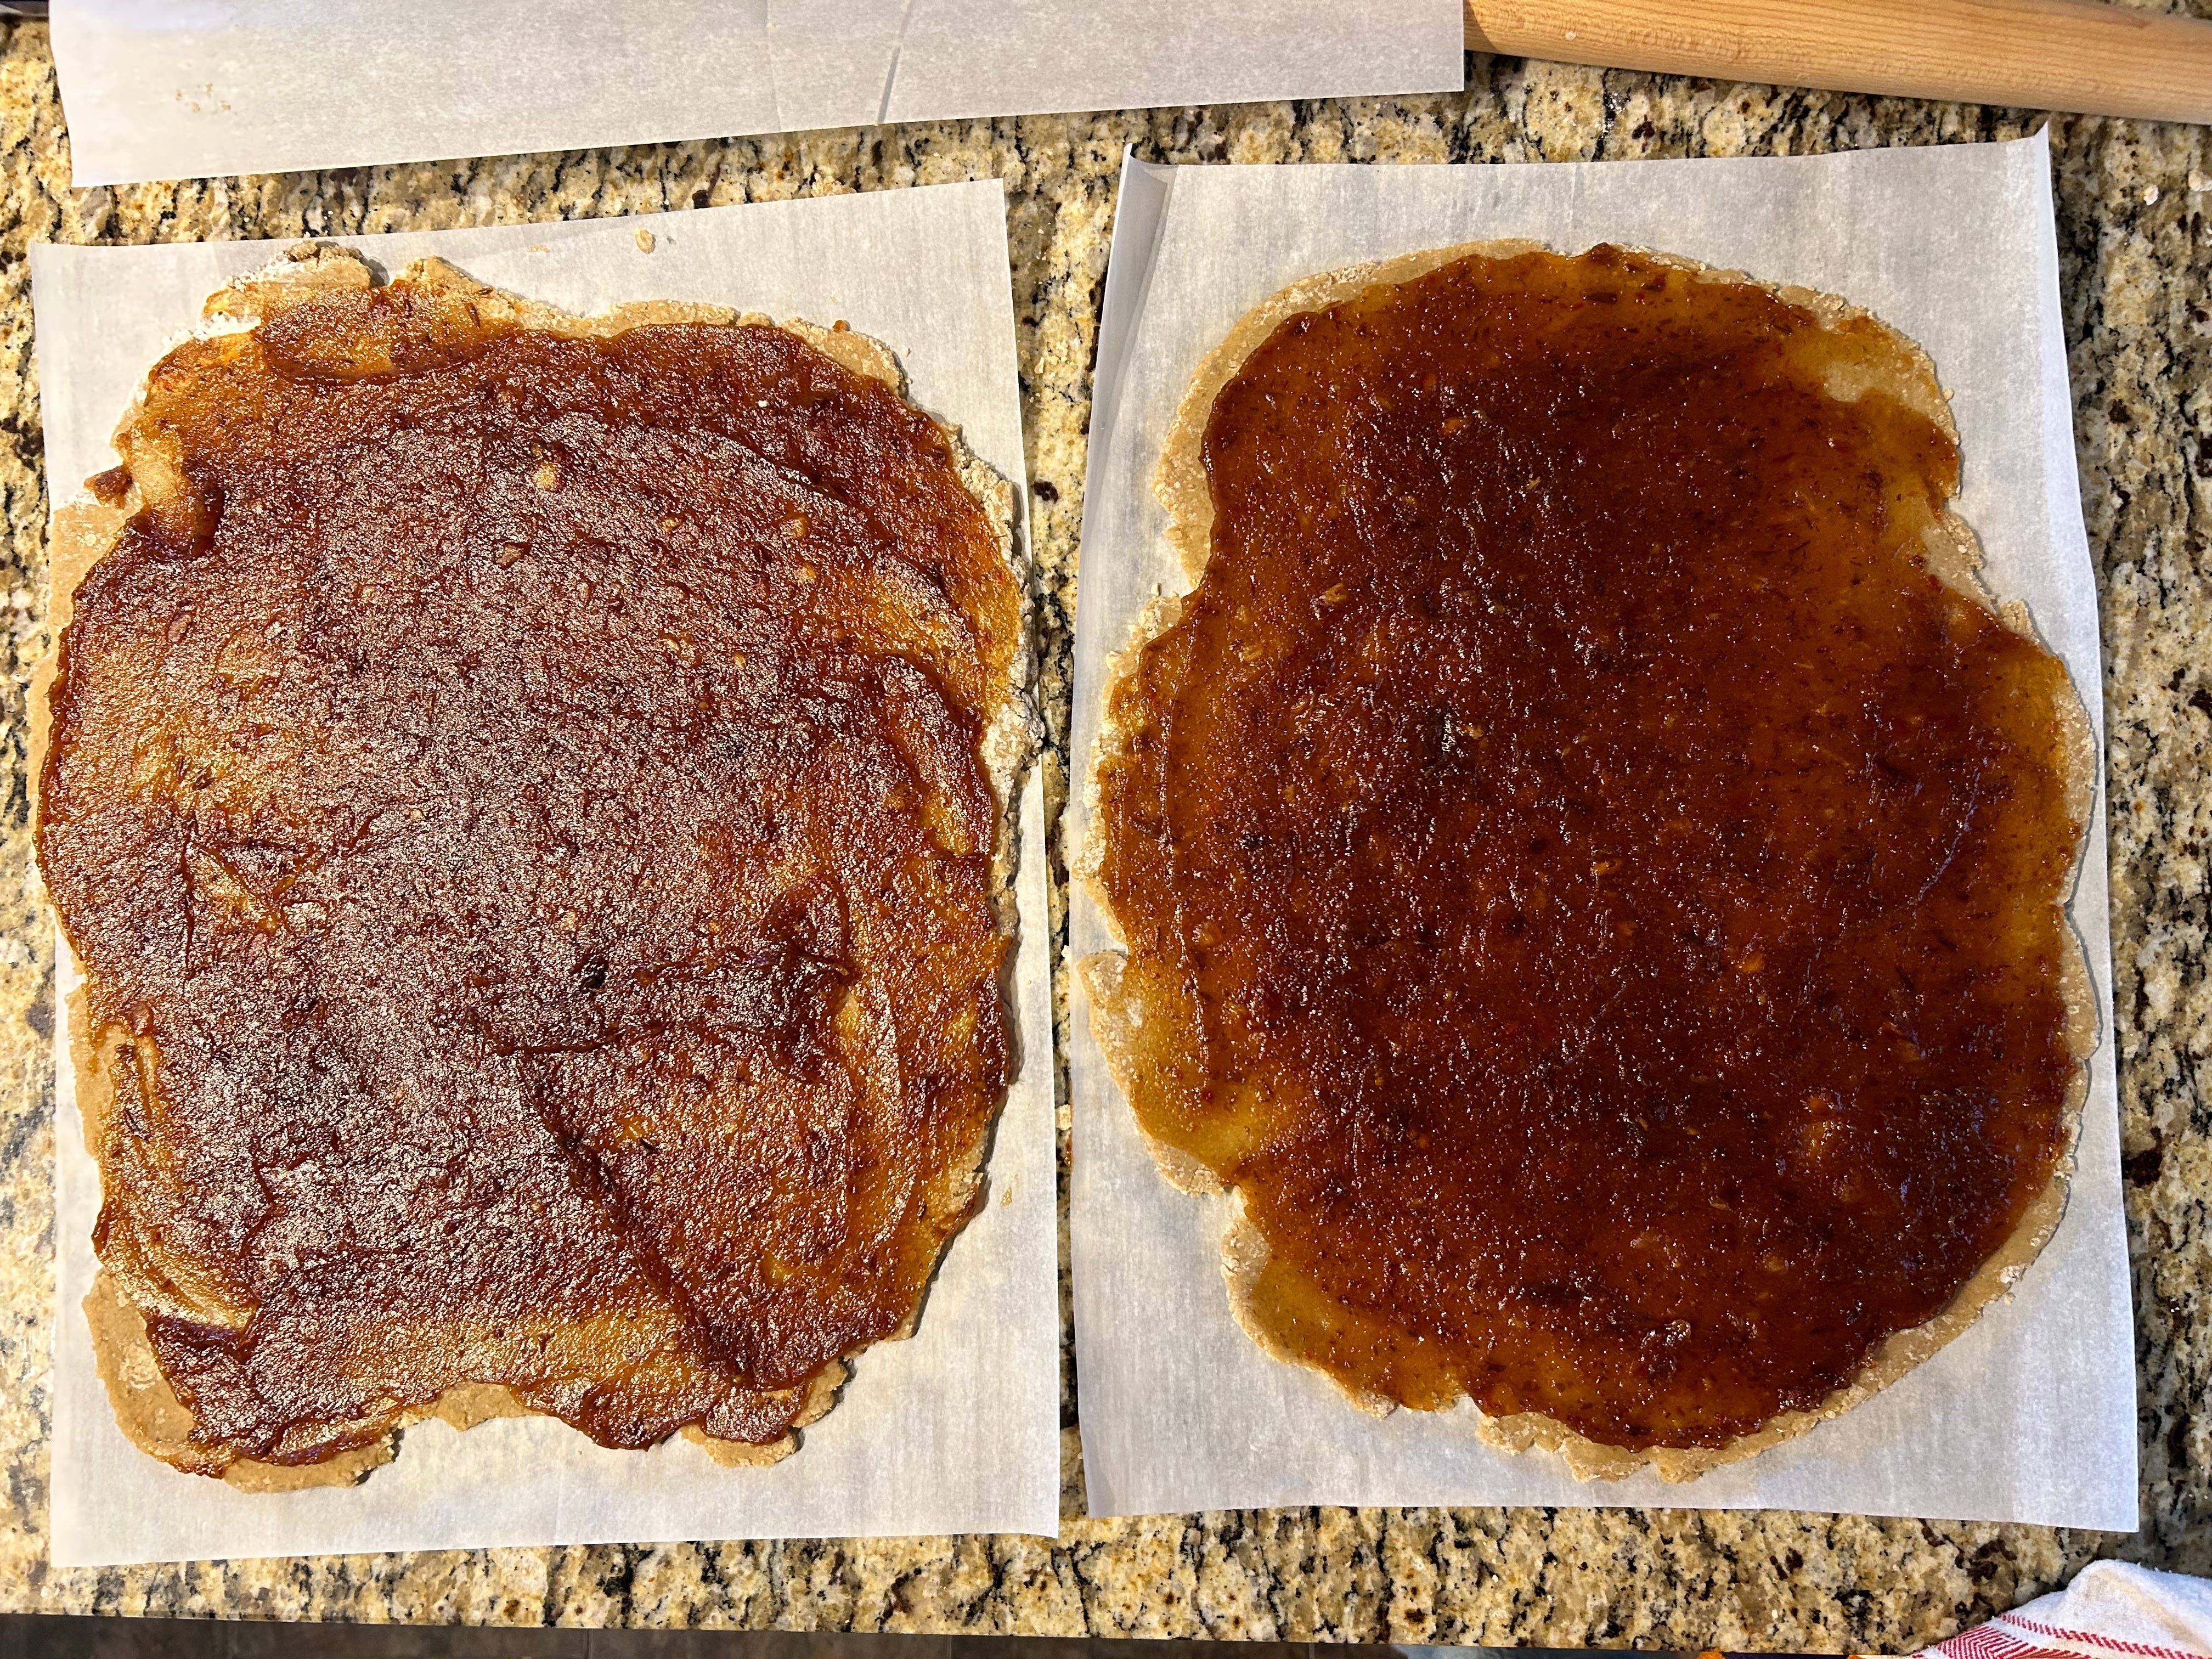
Pat one piece of dough into a rectangle, then lightly flour both sides of dough. Roll out the dough into a rectangle a little more than 1/8-inch thick — easiest if you roll between two sheets of parchment paper. Repeat with the other piece of dough. (As you can see in the photo above, perfect rectangles not required.)
If your kitchen is warm and the dough seems quite soft at this point, refrigerate the rolled-out slabs of dough for 30 minutes to an hour, until firmer but still pliable. Otherwise, carry on.
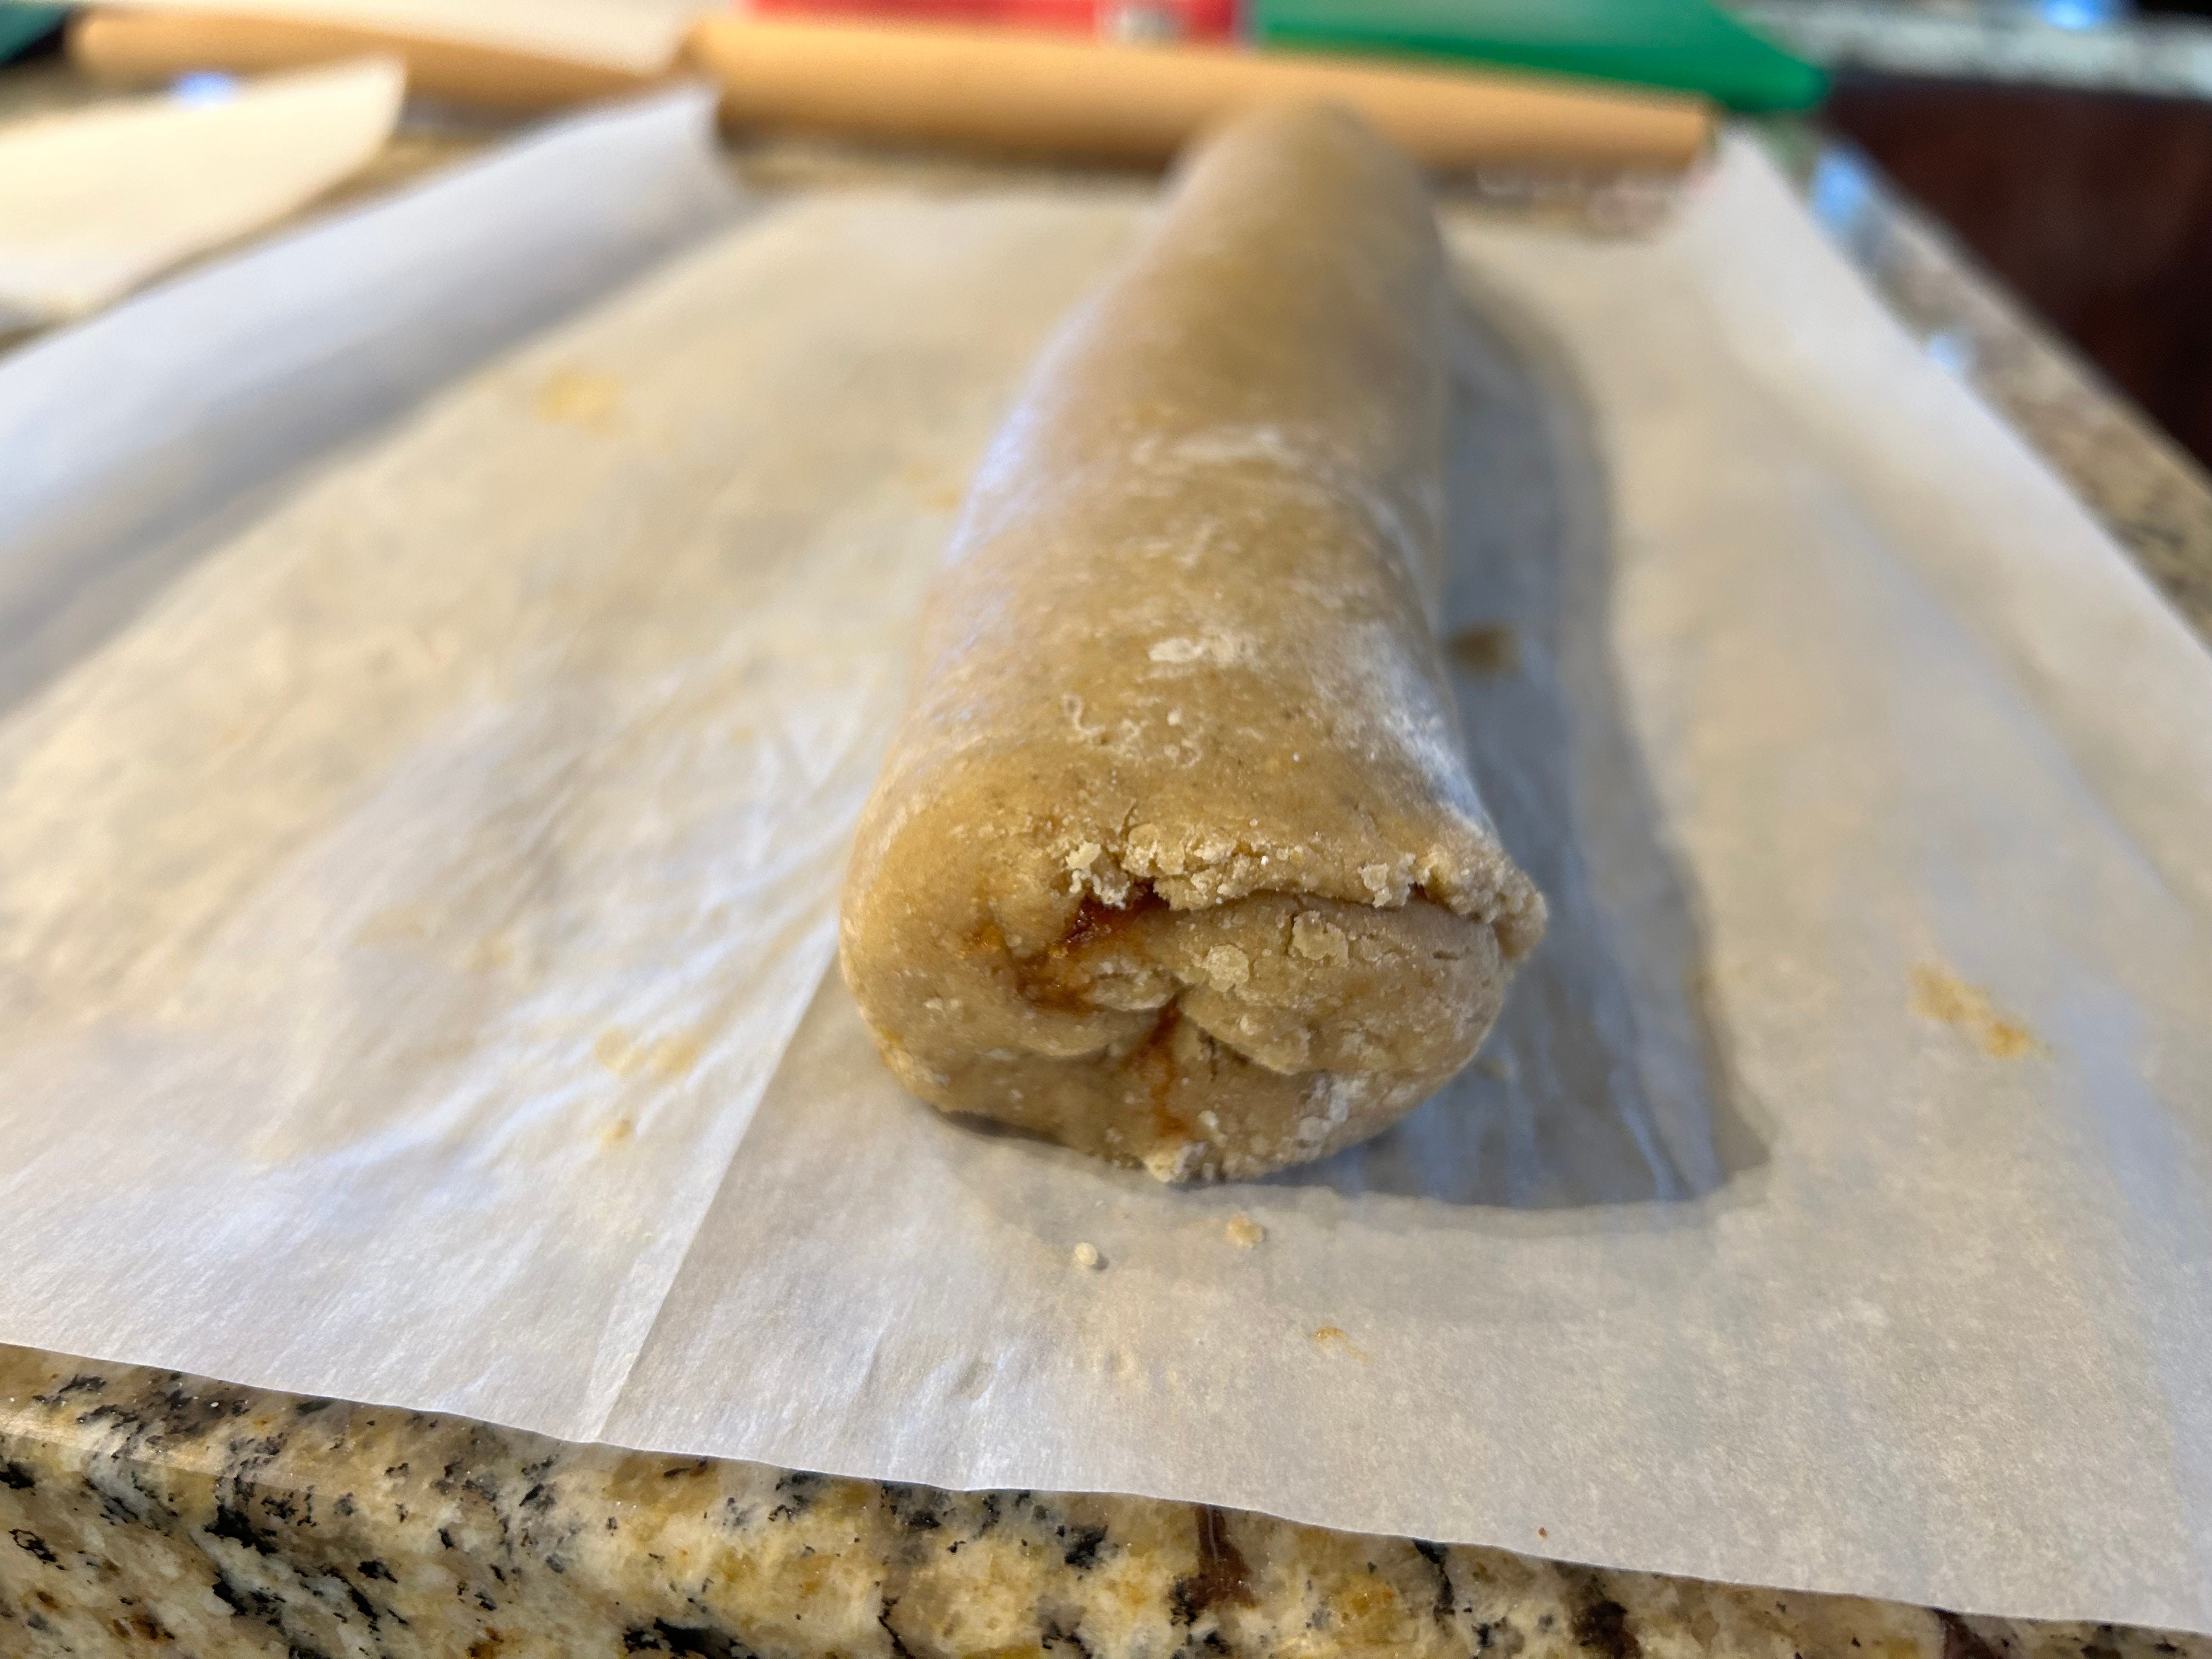
To assemble: once your filling cools to room temp, spread half on each piece of dough, going all the way to the edges. Starting from a long edge, roll up the topped doughs as tightly as you can, using the parchment to help guide you. Push/tuck the ends of the rolls to seal.
Wrap the rolls with the parchment you’ve been using, then refrigerate for at least 8 hours and up to 3 days.
When ready to bake: preheat your oven to 375 degrees. Line two baking sheets with parchment or a silpat. Cut cookies about 1/4- to 1/2-inch thick, spacing them about an inch apart on your baking sheets. (They won’t all fit on two sheets, so you’ll bake in batches.)
Bake one sheet at a time, middle rack, for 8 to 10 minutes, or until set and light golden on the edges but still a little squishy in the center of the cookies. Let the cookies cool on the baking sheet until firm, at least 5 minutes. Remove and repeat until you’ve baked all your cookies.
Store at room temp for up to a week, or a little longer — they’ll dry out a bit, but the filling keeps them pretty fresh.
P.S. You’re not imagining things — while I usually send newsletters on Saturdays, this one came early. A Christmas miracle?
This year was a bit of a roller coaster (an understatement) and the holiday season is … well, it’s happening. I’m about to log off and read a Christmas tale involving witches, the devil, a small Ukrainian village, and flying varenyky. Seems appropriate.
Thank you so much for reading, commenting, emailing, and sharing my newsletters this year; this is the last one of 2022. I’m in the midst of a big recipe testing/editing project (one reason why these became a bit more sporadic of late ), so I’m not quite sure when I will resume the newsletter in 2023.
See you sometime.
Delightful and very interesting. I'm half Moroccan and also spent my childhood years in a small eastern Washington town - and I love dates. Next week's project is to veganize your recipe. Thanks for sharing...